
Any simple business card can instantly look impressive with a dash of metallic foil. Hot stamped business card are those cards with the magical ability to make a long-lasting impression. Other than the usual gold foil, you can even choose the type of foil you want, ranging from colors to finishings, some colors even offer matte or glossy finishings. Preparing a hotstamping business card can be pretty simple. In general, a separate layer with a hot-stamp vector set as a spot color should suffice in an artwork file. As for the details, we at Gogoprint will guide you through the steps on how to prepare a hot stamping business card in Adobe Illustrator.
How to Set Up Your Artwork for Hot Stamping
Step 1
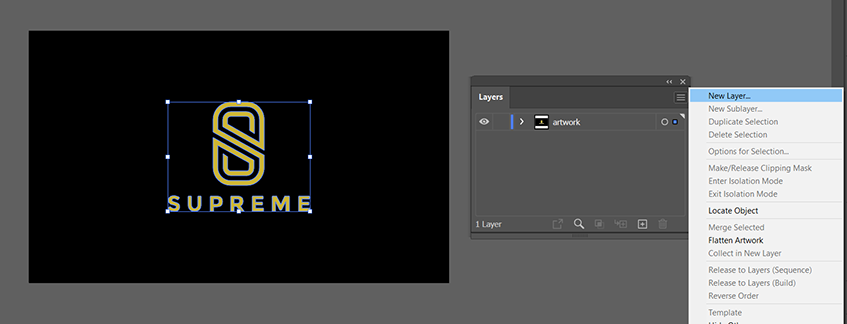
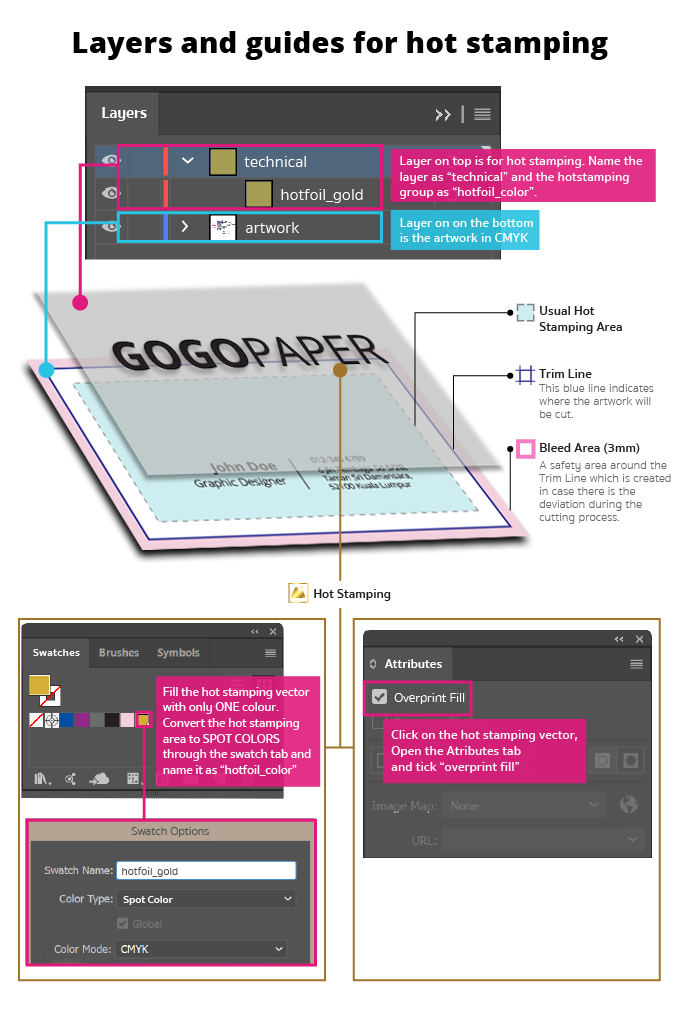
After you’ve set up and designed your business card, access the layers tab through illustrator (Window > Layers), then name your current artwork layer as "artwork". Then create a new layer by clicking on the top right corner of the tab, make sure the new layer is on top of the artwork layer.
Step 2
Double-click on your new layer and name it as "technical". The new technical layer is now the hot stamping area. Next is to cut (ctrl+X) and paste (ctrl+F) your intended hotstamp area into the new technical layer.
*The background and what’s left that requires no hotstamping needs to stay in the artwork layer.
**Make sure there is no duplicated hotstamp area in the artwork layer.
***Keep in mind that you should set up your hot stamping design in vector, not raster format.
Step 3
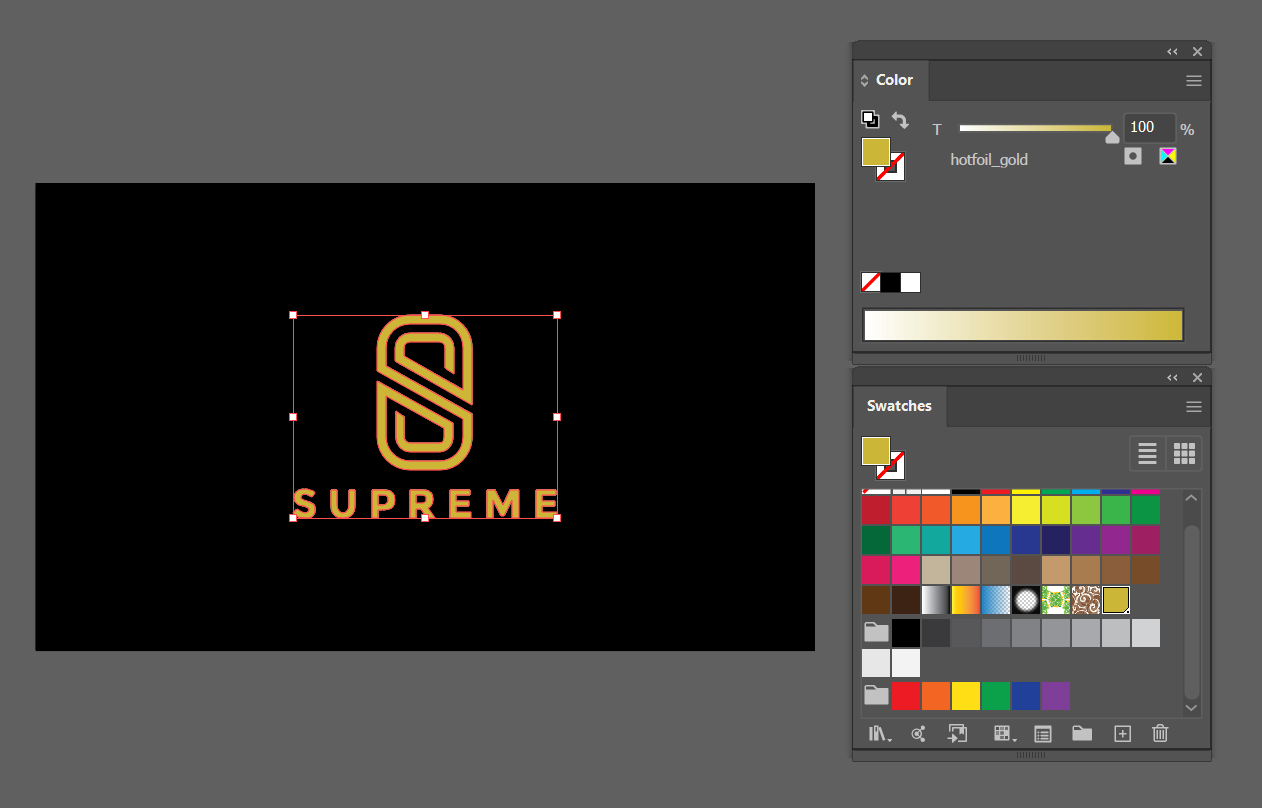
Access the swatch tab (Window > Swatches), then drag your hotstamp colors into the swatch tab as shown in the picture.

Step 4
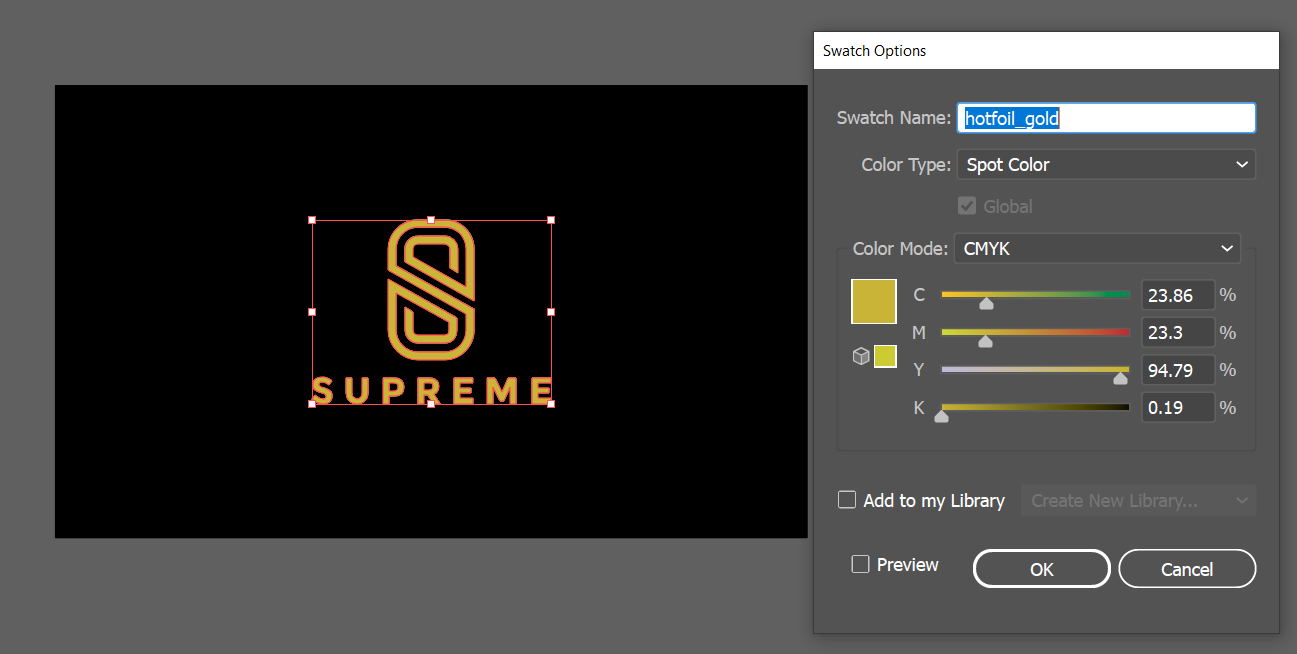
Next is to double-click on your swatch color to make further adjustments. Rename your swatch name as hotfoil_color. For example if its gold hotstamping then it is hotfoil_gold. Then convert your swatch color from “Process Color” to “Spot Color” through the color type of the swatch.
Step 5
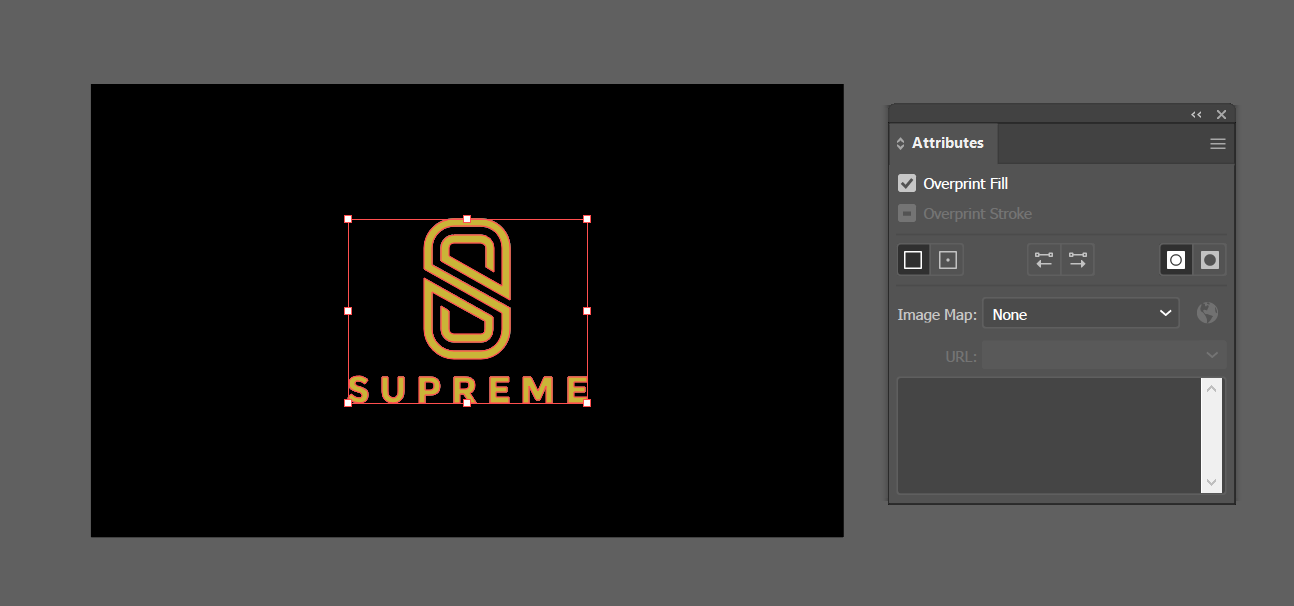
Click on the hot stamping area, and open Attributes Tab (Windows > Attributes) to tick Overprint Fill.
Step 6
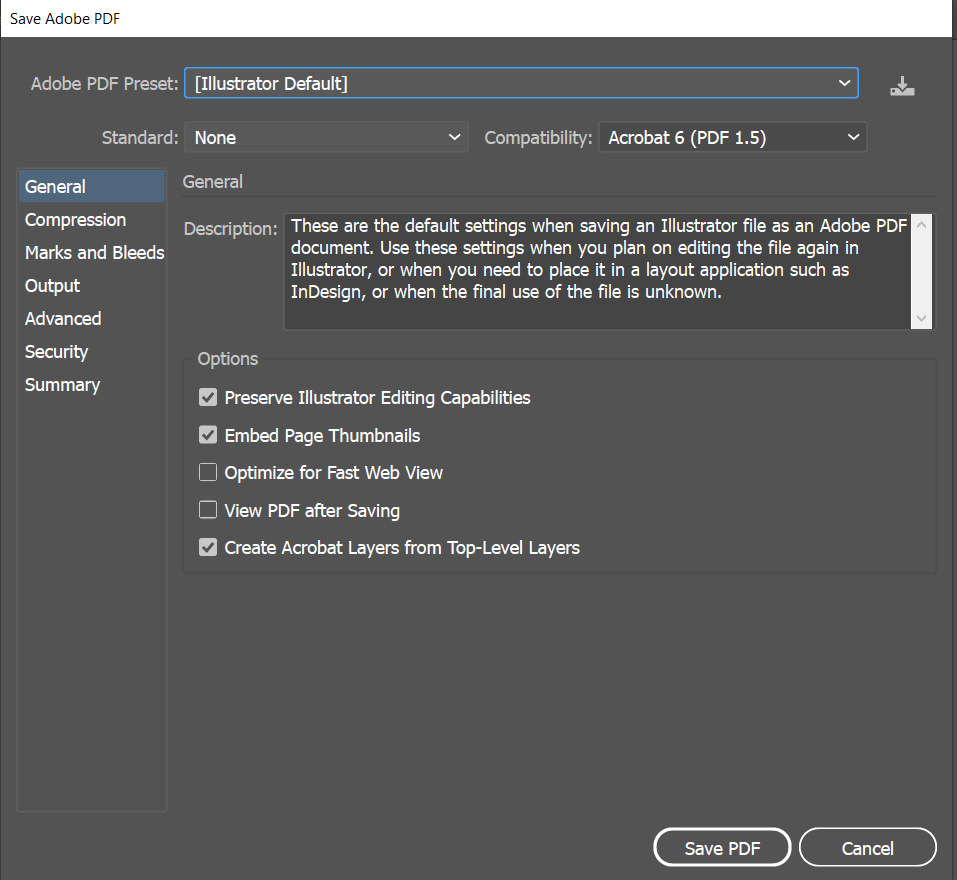
Once everything is set, save your design as a print-ready PDF file. When the pop out window appears, select Illustrator Default from the Adobe PDF Preset menu at the top of the window. Then go ahead and click Save PDF to create your PDF file.
Wrap Up
Congratulations, you are now officially done setting up your hotstamping file!
Just in case, we also have another summarized reference as shown as the image below. If the layers are set correctly, you should be on the right track.
Now that you’re ready to make your own shiny business cards, check out our website for a wide selection of colors! In Gogoprint, we offer various shiny hotfoil colors: Gold, Matte Gold, Silver, Matte Silver, Rose Gold, Red, Green and Blue. One thing to keep in mind however is that only one hotstamping color can be used for each card, so choose wisely! If you still have questions regarding hotstamped business cards, feel free to send us a message or give us a call, we will always be there to help you out :)