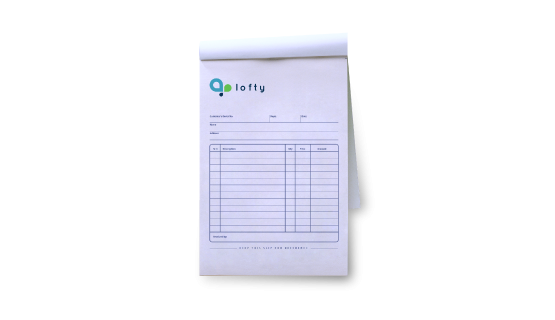
custom printing services for Bill Books

Print NCR Bill Books Online

Bill Books are one of the most versatile marketing tools for any business. They are a quick and inexpensive way to share your contact details with business partners or new potential clients and play an important role in creating a lasting first impression.

Select one of the options below to get started

Upload Your Design

Click here to select your product options and to upload your print-ready artwork.

Let Us Design Or Adjust Your Artwork

Click here if you want us to design or you need help to create a ready-to-print file (e.g. editing of formatting).

Browse Our Templates

Select this option to browse our templates and create your artwork online

STEP 1Choose Your Options
Need help configuring your product or preparing your artwork?
50490, Kuala Lumpur
Bill Books
Format
Choose Format
Infos & TipsOur bill books are available in a wide range of sizes to suit all business and recordkeeping needs. Whether you need something compact for on-the-go transactions or a larger format for detailed documentation, our bill books are designed to deliver clarity, durability, and convenience. Each book features clean ruling, carbonless copy paper, and sturdy binding—making them a reliable choice for retail counters, field services, office administration, and more.
How to choose the ideal size?If you have a design, verify its dimensions using Adobe Acrobat’s 'Check Document Property' function; learn morehereDon’t have a design yet? Use our templates specifically tailored for the available sizes.
Colors
Choose Colors
Infos & TipsChoose between full-color printing for eye-catching designs or single-color printing for a crisp, clean and proffesional look.
Looking for custom Bill Books with full-color or single color printing?We offer both full-color printing and single color options to bring your Bill Book designs to life with maximum impact. Whether you're looking for vibrant, high-quality prints using full-color printing or a solid single-color for a clean and professional look, we have the right solution for your branding needs. Our advanced printing techniques ensure sharp detail, long-lasting durability, and a premium finish—perfect for everyday bookkeeping, transaction tracking, customer billings and receipts.
Number of Ply
Choose Number of Ply
Infos & Tips"Our bill books are available in multiple ply options to suit your documentation and recordkeeping requirements.
Each ply is color-coded for easy identification and uses carbonless paper, ensuring clean, legible copies without the need for messy carbon sheets"
How many ply do you need?"2-Ply: One original and one copy—perfect for giving a receipt to a customer while keeping a copy for your records.
3-Ply: Includes one original and two copies—commonly used when multiple parties (e.g., customer, accounts, delivery team) need a record.
4/5-Ply: Suitable for more complex workflows involving multiple departments or stakeholders."
Number of Sheets
Choose Number of Sheets
Infos & TipsOur 50-sheet bill book is built for everyday efficiency—featuring a clean, easy-to-use layout and sturdy construction that keeps your sales, receipts, or records neatly organized and secure.
Why 50 sheets?Because it strikes the perfect balance between usability and convenience—enough space for frequent transactions without adding bulk, making it ideal for retail counters, deliveries, and service-based businesses.
Perforated Line on Gluing Side
Choose Perforated Line on Gluing Side
Infos & Tips"Our bill books are available with perforated lines on each individual sheet, allowing for clean and easy tear-off without damaging the copy underneath.
Books without perforations are also available for those who prefer to keep all pages intact within the booklet."
Should you choose bill books with perforated lines?Bill books with perforated lines are perfect for handing receipts or invoices to customers while keeping a neat copy bound in the book for your records.
Serial Numbers (4 TO 7 digits)
Choose Serial Numbers (4 TO 7 digits)
Infos & TipsFor your business needs, we provide the option to have your bill books labeled with unique sequential serial numbers clearly printed on every page.
Benefits of having a serial number:Serial numbers make it easy to track, reference, and organize transactions. This helps prevent duplication, supports accurate bookkeeping, and ensures accountability across all copies.
Padding
Choose Padding
Infos & TipsChoose between having your bill book glued on the top or on the left to best suit your business style and usage needs.
Should you pick top or left glued bill books?Top glued bill books is ideal for quick tear-off and vertical writing, while left glued works best for side-entry writing and traditional notebook-style use. Choose the one that fits your process best.
STEP 2

Choose a Quantity & Delivery Date

Please select the price below to see the cutoff time.
Quantities
Receive your products by
10 pcs
20 pcs
30 pcs
40 pcs
50 pcs
100 pcs
200 pcs
500 pcs
1,000 pcs
Tue, 1 Jul
Fastest
Wed, 2 Jul
Thu, 3 Jul
Fri, 4 Jul
Cheapest
Can't find the quantity you're looking for? You can add a custom quantity you want
Set Custom Quantity

Product's quantity must be more than 10 pcs and less than 10,000 pcs. In the multiples of 1

Details about ordering Bill Books

  • For more information about Bill books and the available options, have a look at our blog post on the matter
  • Please include only the color (red) for numbering purposes in the excel file. Please email it to [email protected]
  • Need larger quantity? - Please contact us via Email: [email protected] or Phone: +603 7890 1347 .
Information
Artwork Preparation

Please follow our artwork preparation guidelines to ensure that your artwork file is set up correctly.

  • 1. Add 3 mm of bleed

    During the production of paper products, slight cutting imperfections are to be expected - cutting can be off by a couple of millimeters from the cutting line. To allow leeway for such imperfections, you should add 3 mm of bleed on all edges of your artwork. Make sure all colors, background pictures, and elements extend to the edge of the bleed area, to avoid the appearance of white borders on certain edges after cutting. Learn more how to set up the bleed here.

  • 2. Keep your content within a 3 mm safety margin

    To ensure that no important elements (text, graphics, images) get cut off from your paper product, make sure to keep such elements at least 3 mm away from the edge of your finished product dimensions. Click here to know how to set up 3 mm safety margin.

  • 3. Use CMYK colour mode

    Except for silkscreen and pad printing, files should be prepared in CMYK colour mode. Keep in mind that if the setup is wrong, colours on the finished product may differ from the file you sent. Here is how to set your artwork to CMYK colour mode in Adobe Illustrator.

  • 4. Use an image resolution of at least 300 DPI

    To avoid blurriness, use only images and graphics that have a resolution of 300 DPI or more at actual size. Before sending your files, make sure to embed your images into the file. Read more about how to check the resolution of your assets.

  • 5. Use the right values for grey elements

    When setting up grey elements, set the black color (K) to a percentage between 0 and 100, and keep all other colors (C, M, and Y) equal to 0%.

  • 6. Use the right values for black elements

    When setting up black text, thin lines and small elements, use pure black, (i.e. C = 0, M = 0, Y = 0, K = 100). Text, thin lines, and small elements in pure black color should be set to overprint to avoid white gaps around the text. It will give a solid edge to those elements.

  • 7. Use maximum 2 colours for lines that are finer than 2 pt

    If lines are 2 pt thick or less, use only 1 or 2 colours. 4 colours may be used for thicker lines.

  • 8. Convert all fonts to outlines, or embed them in your file

    To avoid issues with fonts when submitting your file(s), make sure to convert fonts to outlines, or to embed all fonts when saving to PDF.

  • 9. Save and upload your artwork files as PDF/X-1a

    The best format for submitting print-ready files is PDF, under the PDF/X-1a standard. Where possible, submit your files in PDF format. See why PDF/X-1a is the right format for printing.

  • 10. Check for overprint

    Make sure that no elements are set on overprint, unless you need them to be.

Templates

Our free templates provide you with all the information you need to correctly prepare your artwork files for printing. Simply download the template that matches your desired product configuration.

FAQ

If you have any questions about the product and ordering process, please have a look at our Frequently Asked Questions (FAQ) Click here!. If can't find your question in our FAQ section, you can reach our friendly customer support on +603 7890 1347.

  • 1. What is the fastest delivery for n?

    The fastest delivery time for n is d. Please note that you have to submit your order before 12:00 PM. Late payment or upload of your artwork might further delay your order.

  • 2. Which production techniques are used?

    Depending on the quantity that you order, we use either digital or offset printing. In any case, we rely on the most technologically advanced printing equipment to guarantee the highest printing quality for our business cards.

  • 3. How will my product be delivered?

    All of our products are delivered in a securely packed cardboard box.

  • 4. Which formats can I upload?

    For n, please upload your files using the PDF format.

Guides and Tools

Everything you need to know to get your Artwork ready

Please follow our artwork preparation guidelines to ensure that your artwork file is set up correctly.

  • 1. Add 3 mm of bleed

    During the production of paper products, slight cutting imperfections are to be expected - cutting can be off by a couple of millimeters from the cutting line. To allow leeway for such imperfections, you should add 3 mm of bleed on all edges of your artwork. Make sure all colors, background pictures, and elements extend to the edge of the bleed area, to avoid the appearance of white borders on certain edges after cutting. Learn more how to set up the bleed here.

  • 2. Keep your content within a 3 mm safety margin

    To ensure that no important elements (text, graphics, images) get cut off from your paper product, make sure to keep such elements at least 3 mm away from the edge of your finished product dimensions. Click here to know how to set up 3 mm safety margin.

  • 3. Use CMYK colour mode

    Except for silkscreen and pad printing, files should be prepared in CMYK colour mode. Keep in mind that if the setup is wrong, colours on the finished product may differ from the file you sent. Here is how to set your artwork to CMYK colour mode in Adobe Illustrator.

  • 4. Use an image resolution of at least 300 DPI

    To avoid blurriness, use only images and graphics that have a resolution of 300 DPI or more at actual size. Before sending your files, make sure to embed your images into the file. Read more about how to check the resolution of your assets.

  • 5. Use the right values for grey elements

    When setting up grey elements, set the black color (K) to a percentage between 0 and 100, and keep all other colors (C, M, and Y) equal to 0%.

  • 6. Use the right values for black elements

    When setting up black text, thin lines and small elements, use pure black, (i.e. C = 0, M = 0, Y = 0, K = 100). Text, thin lines, and small elements in pure black color should be set to overprint to avoid white gaps around the text. It will give a solid edge to those elements.

  • 7. Use maximum 2 colours for lines that are finer than 2 pt

    If lines are 2 pt thick or less, use only 1 or 2 colours. 4 colours may be used for thicker lines.

  • 8. Convert all fonts to outlines, or embed them in your file

    To avoid issues with fonts when submitting your file(s), make sure to convert fonts to outlines, or to embed all fonts when saving to PDF.

  • 9. Save and upload your artwork files as PDF/X-1a

    The best format for submitting print-ready files is PDF, under the PDF/X-1a standard. Where possible, submit your files in PDF format. See why PDF/X-1a is the right format for printing.

  • 10. Check for overprint

    Make sure that no elements are set on overprint, unless you need them to be.

Our free templates provide you with all the information you need to correctly prepare your artwork files for printing. Simply download the template that matches your desired product configuration.

If you have any questions about the product and ordering process, please have a look at our Frequently Asked Questions (FAQ) Click here!. If can't find your question in our FAQ section, you can reach our friendly customer support on +603 7890 1347.

  • 1. What is the fastest delivery for n?

    The fastest delivery time for n is d. Please note that you have to submit your order before 12:00 PM. Late payment or upload of your artwork might further delay your order.

  • 2. Which production techniques are used?

    Depending on the quantity that you order, we use either digital or offset printing. In any case, we rely on the most technologically advanced printing equipment to guarantee the highest printing quality for our business cards.

  • 3. How will my product be delivered?

    All of our products are delivered in a securely packed cardboard box.

  • 4. Which formats can I upload?

    For n, please upload your files using the PDF format.