


STEP 1Choose Your Options
Need help configuring your product or preparing your artwork?
50490, Kuala Lumpur
Custom Tapes
Format
Choose Format
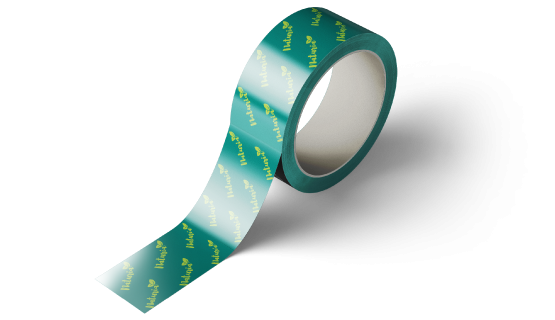
Infos & Tips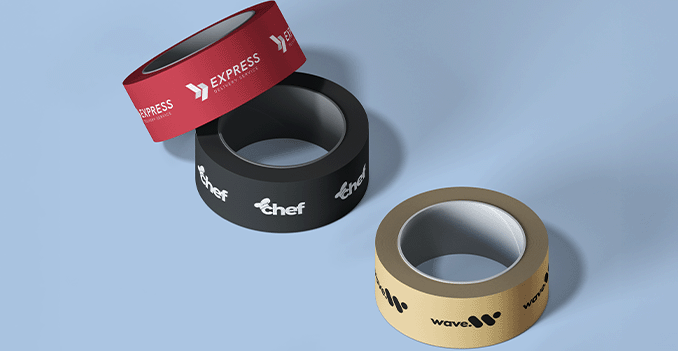 "Enhance your packaging with our custom tape rolls, available in three practical widths: 18mm, 24mm, and 48mm. Designed to combine secure sealing with impactful branding, our tapes are perfect for businesses and individuals that want every parcel to make a strong first impression.
Whether you're sealing small boxes or shipping large packages, we have the right size to match your needs."
"Enhance your packaging with our custom tape rolls, available in three practical widths: 18mm, 24mm, and 48mm. Designed to combine secure sealing with impactful branding, our tapes are perfect for businesses and individuals that want every parcel to make a strong first impression.Whether you're sealing small boxes or shipping large packages, we have the right size to match your needs."
How to choose the ideal tape width?
If you already have a design, verify its dimensions using Adobe Acrobat’s 'Check Document Property' function; discover more here. Don’t have a design yet? Take advantage of our templates crafted specifically for these exclusive sizes.Base Color
Choose Base Color
Infos & Tips "Whether you're aiming for elegance or eye-catching impact, our custom tape is the perfect finishing touch to elevate your unboxing experience.
Choose from three distinct base color options to complement your design."
White Base – A crisp, neutral background that makes your logo and messaging stand out with clarity and precision.
Colored Base – Available in a variety of bold colors to match your brand identity and create a strong, memorable impression."
"Whether you're aiming for elegance or eye-catching impact, our custom tape is the perfect finishing touch to elevate your unboxing experience.Choose from three distinct base color options to complement your design."
Our base colors:
"Transparent Base – Offers a clean, understated look that allows your packaging to show through. Ideal for subtle branding or minimalist styles.White Base – A crisp, neutral background that makes your logo and messaging stand out with clarity and precision.
Colored Base – Available in a variety of bold colors to match your brand identity and create a strong, memorable impression."
Colors
Choose Colors
Infos & Tips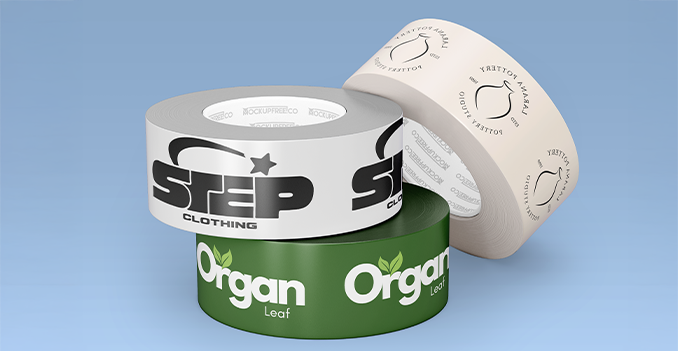 Personalize your custom tape rolls with your logo or design, available in 1-color or 2-color print options to suit your branding needs.
2-Color Print – Adds visual depth and greater brand recognition by incorporating an additional color for contrast, accents, or highlights. Perfect for logos with layered design elements or multiple brand tones."
Personalize your custom tape rolls with your logo or design, available in 1-color or 2-color print options to suit your branding needs.Should you pick 1 or 2 color logos?
"1-Color Print – A clean choice that delivers sharp, bold branding. Ideal for minimalist logos or straightforward messaging.2-Color Print – Adds visual depth and greater brand recognition by incorporating an additional color for contrast, accents, or highlights. Perfect for logos with layered design elements or multiple brand tones."
STEP 2
Choose a Quantity & Delivery Date
Please select the price below to see the cutoff time.
Quantities
Receive your products by
500 pcs
600 pcs
800 pcs
1,000 pcs
Can't find the quantity you're looking for? You can add a custom quantity you want
Set Custom Quantity


