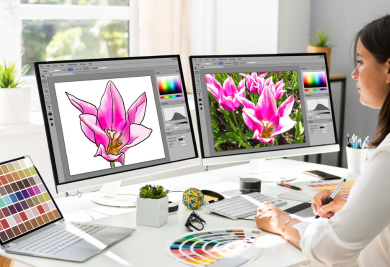
If you’re designing in Canva and printing with Gogoprint, there’s one important thing to know:
Canva’s bleed and margin settings DO NOT match Gogoprint’s requirements.
-
Canva bleed: 0.3175 cm (fixed)
-
Canva margin: 0.1 cm (fixed)
-
Gogoprint required bleed: 0.3 cm
-
Gogoprint required margin: 0.3 cm
Because of this mismatch, the safest approach is:
DO NOT use Canva’s built-in bleed & margin guide
Instead, you will manually set up your design to match Gogoprint’s standard. However, if you’re using Adobe Photoshop or Illustrator, you can refer to the guides here on how to set up bleeds and margins in your artwork.
Step-by-Step: Correct Setup (Simple Method)
We’ll use a Business card (9 × 5 cm) as an example.
1. Start with the Final Size
Your actual Business card size is:
-
Width: 9 cm
-
Height: 5 cm

2. Add Bleed (0.3 cm on all sides)
Bleed goes outside the final size. Add 0.3 cm to each side, which means:
✅ New document size (including bleed):
-
9 cm + Left (0.3cm) + Right (0.3cm) = 9.6 cm total
-
5 cm + Top (0.3cm) + Bottom (0.3cm) = 5.6 cm total
This should be your Canva design size = Actual Business Card + Bleed


3. Create Your Own Trim Line (Final Cut Size)
Since you’ll need to create your own bleed and margin lines manually, here’s a simple guide on how to do it correctly.
1. Go to Elements → Shapes → Square/Rectangle
2. Add the shape to your canvas
3. Resize it to:
-
Width: 9 cm
-
Height: 5 cm
4. Set the shape
-
Fill colour → Transparent (no fill)
-
Border → Turn ON
-
Border weight → 1 pt
-
Border colour → any visible colour (e.g. black)
This box represents your final cut size.
IMPORTANT Reminder: Delete the black box before exporting your file for print. It’s only meant to guide your layout during the design process and should not appear in the final artwork.
**Tip: Centre this box perfectly on your canvas.
4. Create Margin (Safe Area) – Repeat Step 3
Now you’ll create a second guide for your safe margin area. This step is the same as Step 3, but with a smaller size.
Repeat the steps using blue (or any) colour:
-
9 cm - Left (0.3cm) - Right (0.3cm) = 8.4 cm total
-
5 cm - Top (0.3cm) - Bottom (0.3cm) = 4.4 cm total
This should be your Margin / Safe Area box size

5. All Done! How to Properly Download Your File for Printing
The reason you manually set up the bleed and margin is to help guide your design placement and reduce mistakes while preparing your artwork. This ensures your final printed product looks exactly as expected and follows Gogoprint’s printing requirements.
IMPORTANT!
Once your design is finalised, make sure to remove all guide boxes before downloading your file for print.
These boxes are only meant to help you during the design process and should NOT appear in the final artwork submitted for printing.
--
Here’s a Complete Recap to Create Your Bleed & Margin on Canva
Easy Visual Understanding
-
Actual Business Card size = 9 x 5 cm
-
Full canvas = 9.6 × 5.6 cm → includes bleed
-
Trim line (9 × 5 cm) → final card size
-
Safe Margin Area = 8.4 × 4.4 cm → blue box
How to Design Correctly
-
Backgrounds → extend all the way to the full canvas’s edge
-
Images → extend to the full canvas’s edges if full-bleed
-
Text/logo → keep inside the inner safe area box (blue line box)
Important: DO NOT Use Canva Guides
-
❌ Do NOT turn on Canva bleed
-
❌ Do NOT rely on Canva margins
-
❌ They do not match Gogoprint’s standard.
Simple Formula (Remember This)
Document size = Final size + (Bleed × 2)
Example 1:
-
Business Card: 9 × 5 cm
-
Bleed = 0.3 cm
✅ Width: 9 + 0.6 = 9.6 cm
✅ Height: 5 + 0.6 = 5.6 cm
Final Reminder
Make sure to delete the guide boxes (Bleen and Margin) before exporting your file.
**They are only for alignment and guidance during design and should not appear in the final print.
Last but not least, Happy Design and Happy Printing! :)