Need help? Call us at +603 7890 1347

Prices starting from RM 28.68

View Products
Promotional Products

Available with custom print in up to four colors.

View Products
Design Service

Having trouble with your artwork?
Look no further, our design service
team are here to help!

Explore More

How to reach us

+603 7890 1347

social media

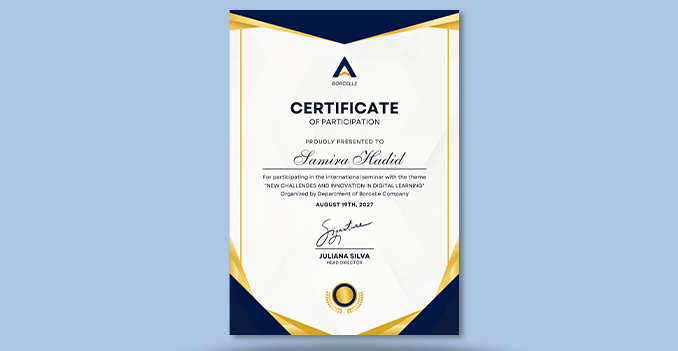
custom printing services for Certificates

Print n

Please follow our artwork preparation guidelines to ensure that your artwork file is set up correctly.

  • 1. Add 3 mm of bleed

    During the production of paper products, slight cutting imperfections are to be expected - cutting can be off by a couple of millimeters from the cutting line. To allow leeway for such imperfections, you should add 3 mm of bleed on all edges of your artwork. Make sure all colors, background pictures, and elements extend to the edge of the bleed area, to avoid the appearance of white borders on certain edges after cutting. Learn more how to set up the bleed here.

  • 2. Keep your content within a 3 mm safety margin

    To ensure that no important elements (text, graphics, images) get cut off from your paper product, make sure to keep such elements at least 3 mm away from the edge of your finished product dimensions. Click here to know how to set up 3 mm safety margin.

  • 3. Use CMYK colour mode

    Except for silkscreen and pad printing, files should be prepared in CMYK colour mode. Keep in mind that if the setup is wrong, colours on the finished product may differ from the file you sent. Here is how to set your artwork to CMYK colour mode in Adobe Illustrator.

  • 4. Use an image resolution of at least 300 DPI

    To avoid blurriness, use only images and graphics that have a resolution of 300 DPI or more at actual size. Before sending your files, make sure to embed your images into the file. Read more about how to check the resolution of your assets.

  • 5. Use the right values for grey elements

    When setting up grey elements, set the black color (K) to a percentage between 0 and 100, and keep all other colors (C, M, and Y) equal to 0%.

  • 6. Use the right values for black elements

    When setting up black text, thin lines and small elements, use pure black, (i.e. C = 0, M = 0, Y = 0, K = 100). Text, thin lines, and small elements in pure black color should be set to overprint to avoid white gaps around the text. It will give a solid edge to those elements.

  • 7. Use maximum 2 colours for lines that are finer than 2 pt

    If lines are 2 pt thick or less, use only 1 or 2 colours. 4 colours may be used for thicker lines.

  • 8. Convert all fonts to outlines, or embed them in your file

    To avoid issues with fonts when submitting your file(s), make sure to convert fonts to outlines, or to embed all fonts when saving to PDF.

  • 9. Save and upload your artwork files as PDF/X-1a

    The best format for submitting print-ready files is PDF, under the PDF/X-1a standard. Where possible, submit your files in PDF format. See why PDF/X-1a is the right format for printing.

  • 10. Check for overprint

    Make sure that no elements are set on overprint, unless you need them to be.

Our free templates provide you with all the information you need to correctly prepare your artwork files for printing. Simply download the template that matches your desired product configuration.

If you have any questions about the product and ordering process, please have a look at our Frequently Asked Questions (FAQ) Click here!. If can't find your question in our FAQ section, you can reach our friendly customer support on +603 7890 1347.

  • 1. What is the fastest delivery for n?

    The fastest delivery time for n is d. Please note that you have to submit your order before 11:00 AM (AEST). Late payment or upload of your artwork might further delay your order. If you select Online Proof or Digital Proof Print during the checkout process, the production will only begin after your approval.

  • 2. Which production techniques are used?

    Depending on the quantity that you order, we use either digital or offset printing. In any case, we rely on the most technologically advanced printing equipment to guarantee the highest printing quality for our business cards.

  • 3. How will my product be delivered?

    All of our products are delivered in a securely packed cardboard box.

  • 4. I can't find what I'm looking for. Can I request a quote?

    If you can't find what you need, please call our customer service team at the above-mentioned number to help you place an order. You can also request a quote from our customer service team for special product configurations that are not available on our website.

  • 5. How can I upload my files?

    If your artwork contains more than one page, you can either upload a single file which contains all pages, or upload separate files each containing one page. Your file(s) can be uploaded either before you checkout and pay, or after. Please note that uploading files late might result in a moved expected delivery date.

  • 6. Which formats can I upload?

    The best format for submitting print-ready files is PDF, under the PDF/X-1a standard. Learn how to save your artwork using PDF/X-1a standard in Adobe Illustrator. However, you can also upload your file in JPEG, PNG, PSD, EPS, TIFF or AI format for an additional fee of RM 25.00. Our graphic designers will then convert your file into a print-ready PDF file.

1 . Choose Service Type

2. Choose Your Options

    • * Width must be between cm and cm
    • * Height must be between cm and cm
    • * Your number of pages is not available.

Format

Size (Width x Height)

Print in Full Color

Full Color Front Only

Paper Type

Personalized Name Options

Details about ordering Certificates

  • Please note that you are required to upload artwork in PDF format with CMYK color mode. Only vector image is printable.
  • Please follow our artwork guidelines, to ensure an optimal print result.
  • For Personalized Name Options, if you wish to have Different Names per Certificate please email a full list in an Excel format to [email protected],including the font type, font size, and font color.
  • Looking for design service do look:

    here!

Certificates

Let us design

Change to other services
  • ProductCertificates
  • Paper Type250gsm White Ivory Card
  • FormatA4
  • PagesFront Only
  • ColorsFull Color Front Only
  • BookbindingNone
  • Personalized Name OptionsDifferent Names per Certificate
  • RefinementNone
  • Quantity
  • Expected delivery

        Request Paper Sample

        Request our sample box for free ! Learn More

        Certificates Product Details

        Print Bookmarks Online

        Print Certificates with Gogoprint to:

        • Promote your business in an original way
        • Reach people with your brand/message on a daily basis
        • Share your photos, designs, paintings, or other in a useful format
        • 310g Art Card paper
        • 310g Art Card paper:

          310g Art Card paper will give your Bookmarks a high class and premium feel. Perfect if you want to stand out. This paper will generate a high quality appeal, placed on any welcome desk, leaving a mark on your customers.
          Reflect the quality and premium aspect of your company, and make a lasting impression.
        • 260g Art Card paper
        • 260g Art Card paper:

          260g Art Card paper offers some of the advantages of our 310g Art Card paper, but at a lower cost. Picking 260g Art Card paper is a good way to limit cost for your Bookmarks while maximizing the sensory impact of your vision.

        • Glossy Lamination
        • Glossy Lamination:

          Lamination consists of a thin plastic film covering your product and protecting it against water, scuffs, and worn edges. This is crucial for tags, which will be attached to products and therefore need to be solid. Choosing Lamination adds elegance and quality to your products, emphasizing your own standards. Glossy Lamination reflects light, and will give colors more pop and vibrance.

        • Matte Lamination
        • Matte Lamination:

          Lamination consists of a thin plastic film covering your product and protecting it against water, scuffs, and worn edges. This is crucial for tags, which will be attached to products and therefore need to be solid. Choosing Lamination adds elegance and quality to your products, emphasizing your own standards. Matte Lamination almost completely eliminates glare (light reflection) issues, and gives your cards a classy, smooth touch.

        • Rounded Corners
        • Rounded Corners:

          Rounding the corners of your tags conveys your more creative side, while at the same time setting your tags aside from the mass of squares. In addition, it will keep them looking fresh for a longer period of time!

        • Matte Lamination & Rounded Corners
        • Matte Lamination & Rounded Corners:

          Enjoy the benefits of matte lamination and rounded corners at the same time! Rounding the corners of your tags conveys your more creative side, while at the same time setting your tags aside from the mass of squares. In addition, it will keep them looking fresh for a longer period of time!

        • Glossy Lamination & Rounded Corners
        • Glossy Lamination & Rounded Corners:

          Enjoy the benefits of matte lamination and rounded corners at the same time! Rounding the corners of your tags conveys your more creative side, while at the same time setting your tags aside from the mass of squares. In addition, it will keep them looking fresh for a longer period of time!

        Why Print Bookmarks Online?

        You all know the situation: you’re reading a great book, completely absorbed into the story, but have to stop reading for some unfortunate reason (need to make food, shower, sleep, or get out of the house…). How are you going to keep track of the page that you stopped reading at? Will you fold the corner of the page and slightly damage your book? Will you use any random piece of paper that you can find? Will you run around the house to find one of your favourite pictures to use as a bookmark? If you have a bookmark at hand, you’re lucky, but they are typically the kind of item that you never find when you need it (because you forgot it in another book, or it fell in your bag). This is a given, and therefore it is good to keep plenty of bookmarks in the house.

        This should be a lesson for your company and/or yourself: people need bookmarks. Being such a useful product, they are an absolutely great way to spread your marketing message, or to share your photography, design, or other skills. This is where it becomes useful to print bookmarks. Whether you are a company, an artist, or somebody that wants to share images or text with their close ones, printing bookmarks ensures that you create a useful object that people will keep and use on a daily basis (if they are avid readers). Distribute them to everybody, and the more you give out per person, the better. This will ensure that people hold on to them longer.

        From a marketing perspective for your company, printing bookmarks in high quality is a valuable opportunity to reach your target audience in a repetitive and lasting way. Design a bookmark that looks and feels pleasing, with very little information but your brand, logo, and maybe a short marketing message (text or graphic elements), don't forget to make sure that your artwork-closing is correct by checking on this link. It is crucial that you do not overload the bookmark with content/text. People won’t read it since they’re already reading something else! To make your branded bookmarks look and feel qualitative and pleasant, and ensure that they are durable, print them with matte lamination, and rounded corners. This will ensure a smooth touch, and will keep them looking fresh for longer.

        If you are an artist (professional or amateur), printing bookmarks with your work is a great way to give friends and family a beautiful and useful object, or to sell your work to a larger audience. Your bookmarks are likely going to contain a lot of visual elements (images, photographs, maybe a little text), it is best to finish them with glossy lamination or UV coating, to ensure that colors are vibrant and your work looks lively. Both of these will also improve the durability of your bookmarks, and avoid rapid wear and tear.

        Printing your bookmarks online with Gogoprint (more information about how to order) allows you to pick from a wide variety of options to ensure that the final product is exactly what you want it to be, while keeping the price low. Pick from different sizes, different papers, and different finishings based on what you are printing on the bookmark. You can print anything from 100 to 10,000 bookmarks, but bear in mind that they will run out fast: it is best to give each person a couple bookmarks, as they are likely to lose them (involuntarily of course) quite fast. For your convenience, order online with Gogoprint to enjoy high quality at low cost, and enjoy free and fast delivery all over the country on top of it.

        Certificates Review & Rating

        
        0 reviews
        No Reviews

        Our Portfolio

        Some of the Products we've Printed

        Business Cards

        Custom Mugs

        Textured Business Cards

        Thermos

        LINE Bear

        Not Sure How to Order? Give Us A Call At +603 7890 1347

        Do You Have Any Questions?

        Our team will help you select the right product and get your order delivered in no time.

        You can also call us

        +603 7890 1347

        Guides and Tools

        Everything you need to know to get your Artwork ready

        Please follow our artwork preparation guidelines to ensure that your artwork file is set up correctly.

        • 1. Add 3 mm of bleed

          During the production of paper products, slight cutting imperfections are to be expected - cutting can be off by a couple of millimeters from the cutting line. To allow leeway for such imperfections, you should add 3 mm of bleed on all edges of your artwork. Make sure all colors, background pictures, and elements extend to the edge of the bleed area, to avoid the appearance of white borders on certain edges after cutting. Learn more how to set up the bleed here.

        • 2. Keep your content within a 3 mm safety margin

          To ensure that no important elements (text, graphics, images) get cut off from your paper product, make sure to keep such elements at least 3 mm away from the edge of your finished product dimensions. Click here to know how to set up 3 mm safety margin.

        • 3. Use CMYK colour mode

          Except for silkscreen and pad printing, files should be prepared in CMYK colour mode. Keep in mind that if the setup is wrong, colours on the finished product may differ from the file you sent. Here is how to set your artwork to CMYK colour mode in Adobe Illustrator.

        • 4. Use an image resolution of at least 300 DPI

          To avoid blurriness, use only images and graphics that have a resolution of 300 DPI or more at actual size. Before sending your files, make sure to embed your images into the file. Read more about how to check the resolution of your assets.

        • 5. Use the right values for grey elements

          When setting up grey elements, set the black color (K) to a percentage between 0 and 100, and keep all other colors (C, M, and Y) equal to 0%.

        • 6. Use the right values for black elements

          When setting up black text, thin lines and small elements, use pure black, (i.e. C = 0, M = 0, Y = 0, K = 100). Text, thin lines, and small elements in pure black color should be set to overprint to avoid white gaps around the text. It will give a solid edge to those elements.

        • 7. Use maximum 2 colours for lines that are finer than 2 pt

          If lines are 2 pt thick or less, use only 1 or 2 colours. 4 colours may be used for thicker lines.

        • 8. Convert all fonts to outlines, or embed them in your file

          To avoid issues with fonts when submitting your file(s), make sure to convert fonts to outlines, or to embed all fonts when saving to PDF.

        • 9. Save and upload your artwork files as PDF/X-1a

          The best format for submitting print-ready files is PDF, under the PDF/X-1a standard. Where possible, submit your files in PDF format. See why PDF/X-1a is the right format for printing.

        • 10. Check for overprint

          Make sure that no elements are set on overprint, unless you need them to be.

        Our free templates provide you with all the information you need to correctly prepare your artwork files for printing. Simply download the template that matches your desired product configuration.

        If you have any questions about the product and ordering process, please have a look at our Frequently Asked Questions (FAQ) Click here!. If can't find your question in our FAQ section, you can reach our friendly customer support on +603 7890 1347.

        • 1. What is the fastest delivery for n?

          The fastest delivery time for n is d. Please note that you have to submit your order before 11:00 AM (AEST). Late payment or upload of your artwork might further delay your order. If you select Online Proof or Digital Proof Print during the checkout process, the production will only begin after your approval.

        • 2. Which production techniques are used?

          Depending on the quantity that you order, we use either digital or offset printing. In any case, we rely on the most technologically advanced printing equipment to guarantee the highest printing quality for our business cards.

        • 3. How will my product be delivered?

          All of our products are delivered in a securely packed cardboard box.

        • 4. I can't find what I'm looking for. Can I request a quote?

          If you can't find what you need, please call our customer service team at the above-mentioned number to help you place an order. You can also request a quote from our customer service team for special product configurations that are not available on our website.

        • 5. How can I upload my files?

          If your artwork contains more than one page, you can either upload a single file which contains all pages, or upload separate files each containing one page. Your file(s) can be uploaded either before you checkout and pay, or after. Please note that uploading files late might result in a moved expected delivery date.

        • 6. Which formats can I upload?

          The best format for submitting print-ready files is PDF, under the PDF/X-1a standard. Learn how to save your artwork using PDF/X-1a standard in Adobe Illustrator. However, you can also upload your file in JPEG, PNG, PSD, EPS, TIFF or AI format for an additional fee of RM 25.00. Our graphic designers will then convert your file into a print-ready PDF file.